Cloudflare Zero Trust lets you protect WordPress login pages and firmly thwart hackers from trying to infiltrate your application. It also eliminates bot traffic that uses up server resources. Here are the steps to implement it.
Table of Contents
Prerequisites for Cloudflare Zero Trust and WordPress Logins
Before you get started, you have to ensure that you take care of the following:
- Integrate your WordPress website with Cloudflare
- Have a list of email IDs that are “approved” to log into WordPress
If you’re the only user of your website, then you only need your own email address, nothing more.
Step 1: Access the Cloudflare Zero Trust Dashboard
Log into Cloudflare and click “Access” as shown here.
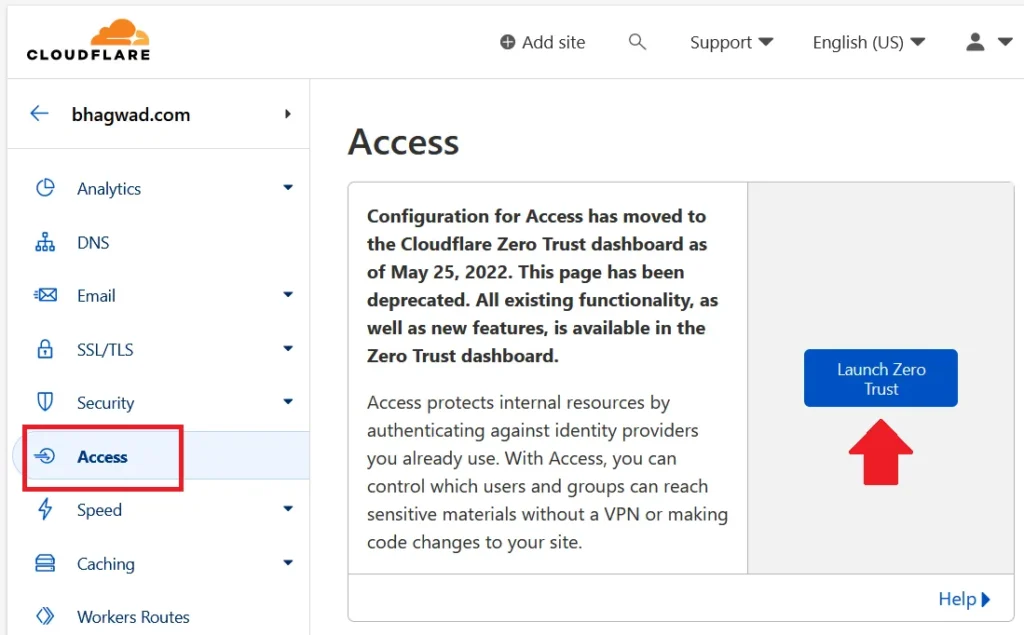
Now click “Launch Zero Trust”. This action will take you to a separate panel to manage your Zero Trust applications.
Step 2: Add WordPress Login to Cloudflare Zero Trust
In the Cloudflare Zero Trust screen, expand the “Access” section and choose “Applications”.
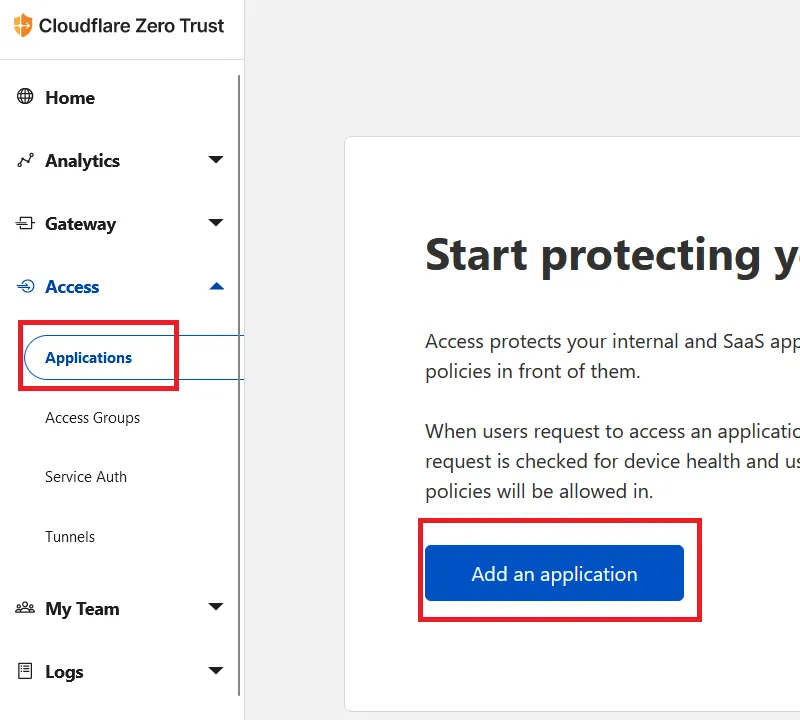
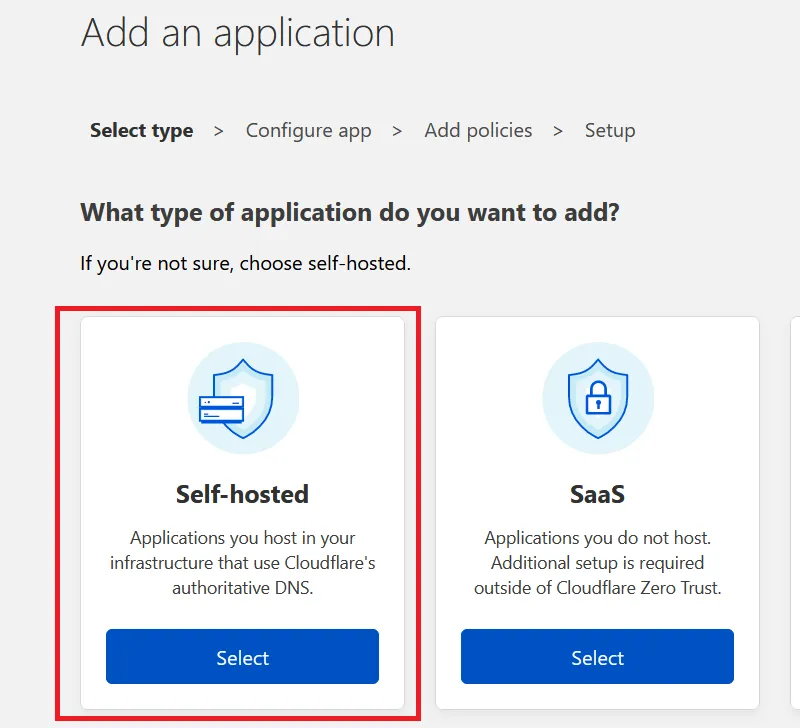
Now click “Add an application” as shown here. Since WordPress is a self-hosted application, choose “Self-hosted” when asked, “What type of application do you want to add?” as shown here:
Now we need to configure it properly.
Step 3: Configure WordPress
Here’s where we provide the details of WordPress. Under “Application Configuration”, give your WordPress application a name and under “Domain”, either type your WordPress domain or select it from the list of applications you’ve integrated with Cloudflare.
If you’ve installed WordPress in a subdomain, you should specify that under the “Subdomain” field.
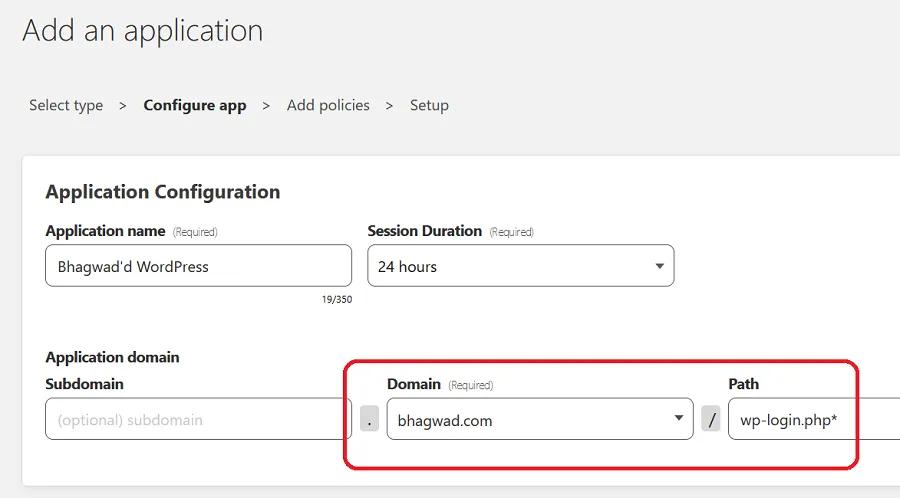
Under “Path”, type “wp-login.php*. If you’ve installed WordPress in a subdirectory, add that as well. The combination of the subdomain, the domain, and the path should lead to your WordPress login page:
Subdomain + domain + path = WordPress login
Scrolling down, we’ll configure Cloudflare to send a one-time PIN to the email address that’s trying to log in:
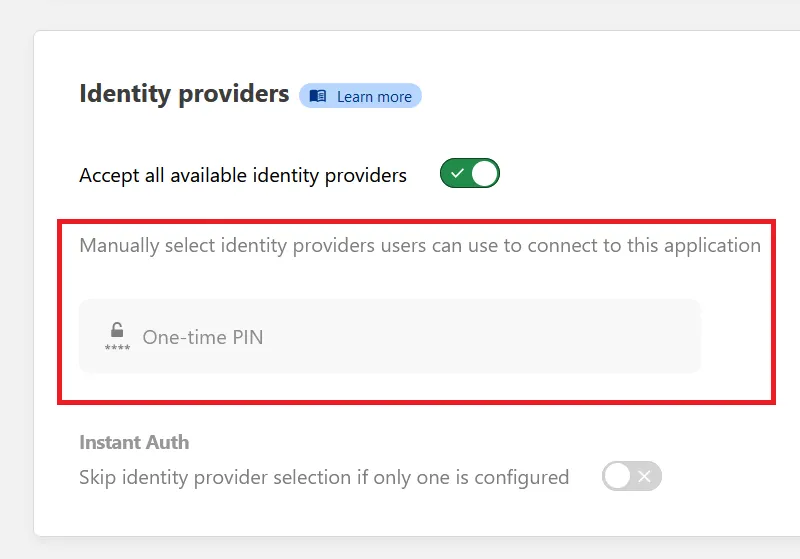
There are currently no further configurations, so go to the top of the page and click “Next” where we can add the policies.
Step 4: Add Login Policies
The WordPress login policy is the list of email IDs you created before you started this tutorial. Under “Policy Name”, write a descriptive name, and under “Configure rules”, choose “Emails” as the Selector:
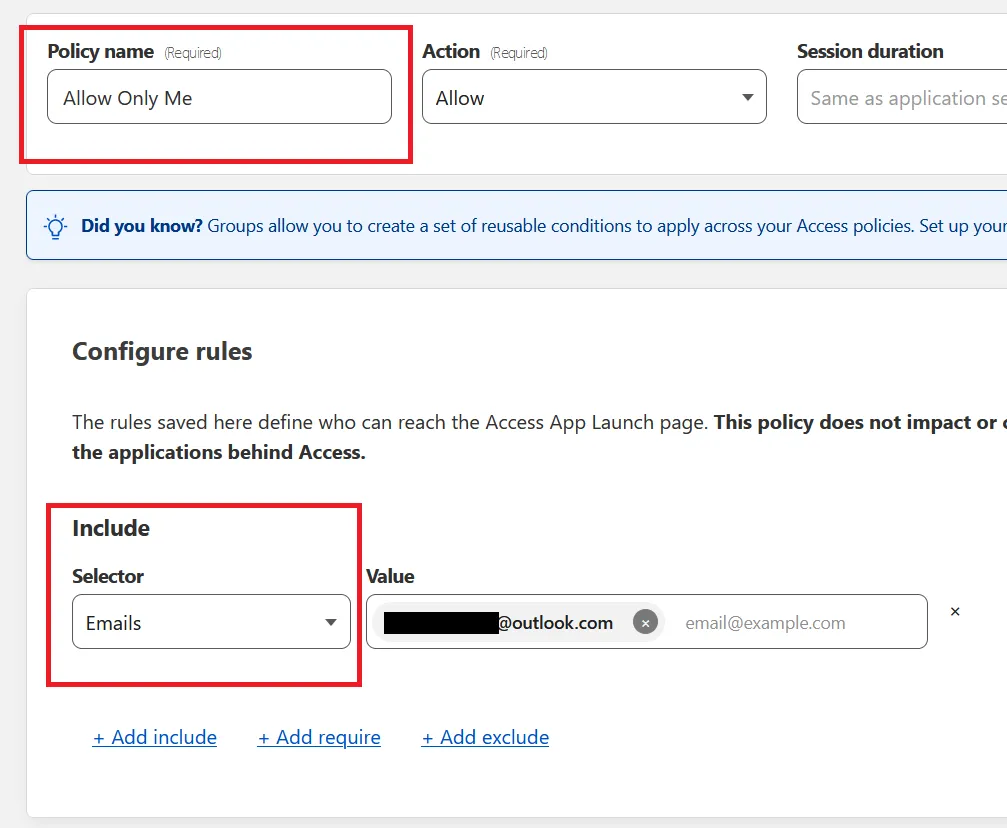
Under “Value”, enter the email IDs from the prerequisite step. Since I’m the sole website owner, I have just one email address to add here. When you’re done, click “Next” at the top of the page, and then finally, “Add application” as shown here:
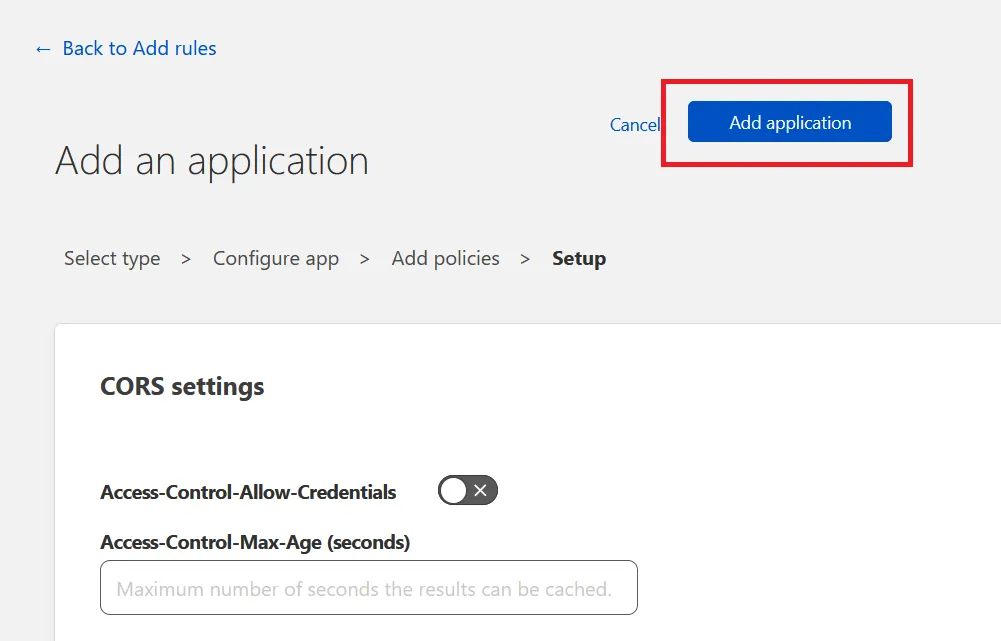
You’re done! Now let’s test it and see if it works.
Testing WordPress Login with Cloudflare Zero Trust
Once you’ve saved your changes, navigate to your WordPress login page. If you’ve done everything correctly, it should redirect to a Cloudflare page like this:
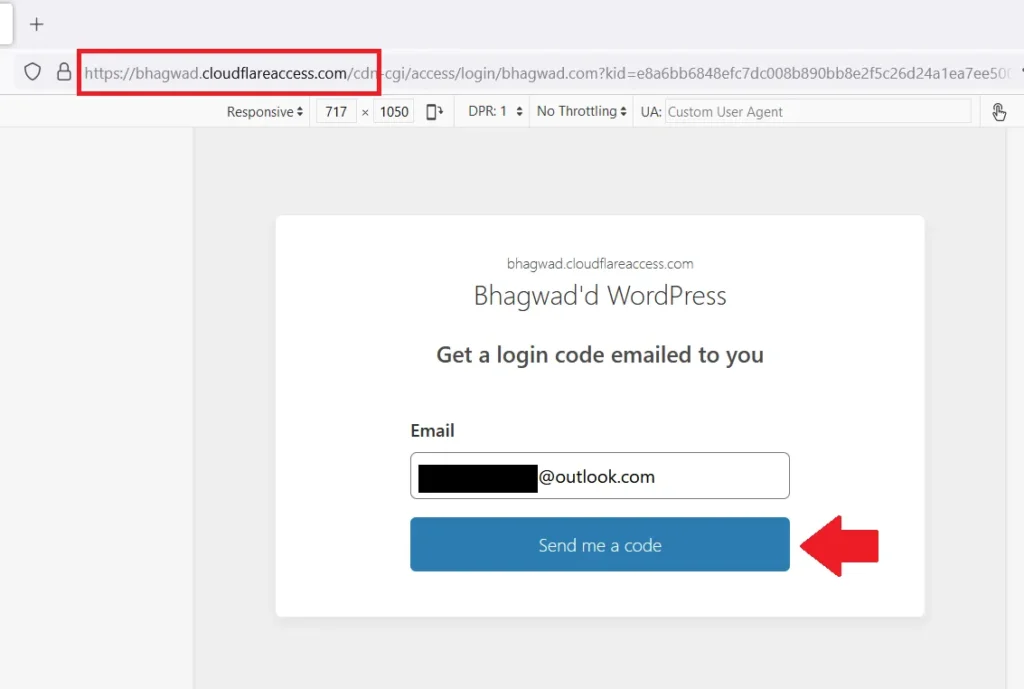
Instead of seeing the WordPress login page asking for your username and password, Cloudflare asks you for your email ID. To access, enter an email ID on the list of emails you entered in step 4. This will send you a confirmation with a one-time PIN like this:
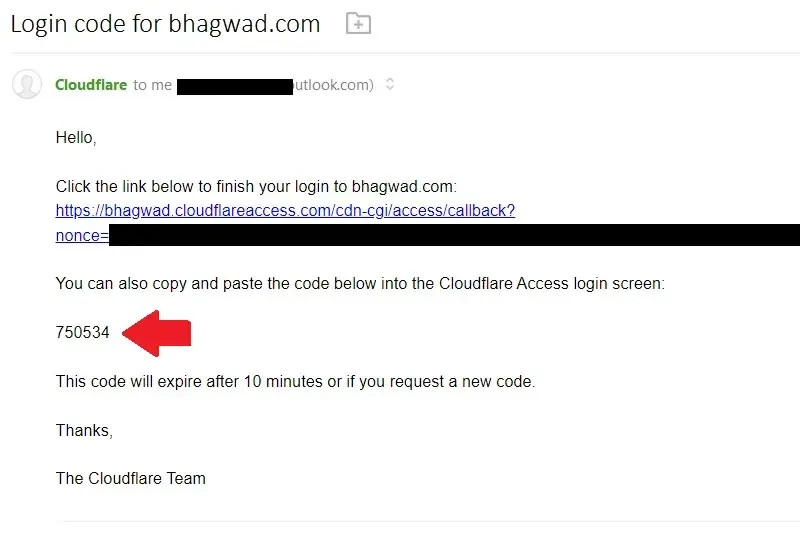
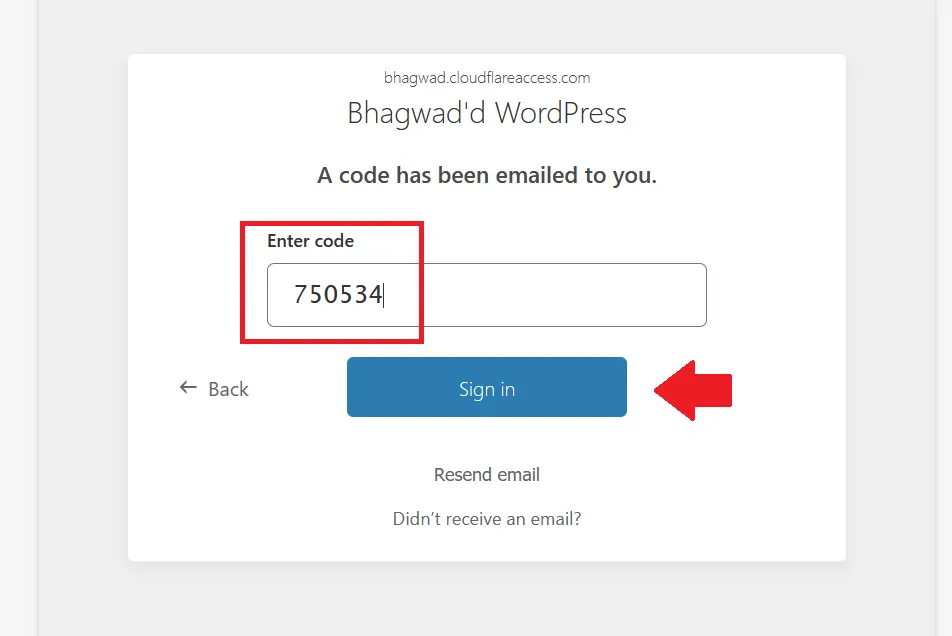
Copy the pin in the email and paste it under “Enter code” on the screen where it says, “A code has been emailed to you”:
If the code is correct, Cloudflare Zero Trust will let you access the WordPress login page as shown here:
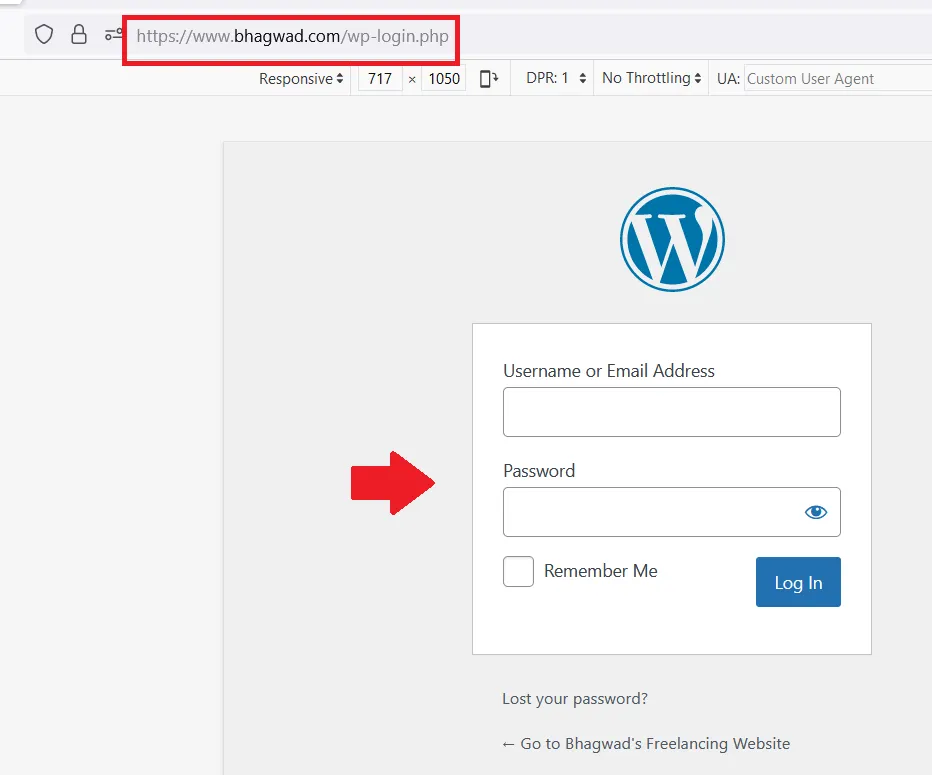
Now enter your WordPress login username and password to access the dashboard!
Cloudflare Zero Trust Analytics
You can monitor how many people tried to access your WordPress login page and how many passed the test. In the Cloudflare Zero Trust dashboard, expand “Analytics” and click “Access”. This will show you a graph and the statistics of attempts:
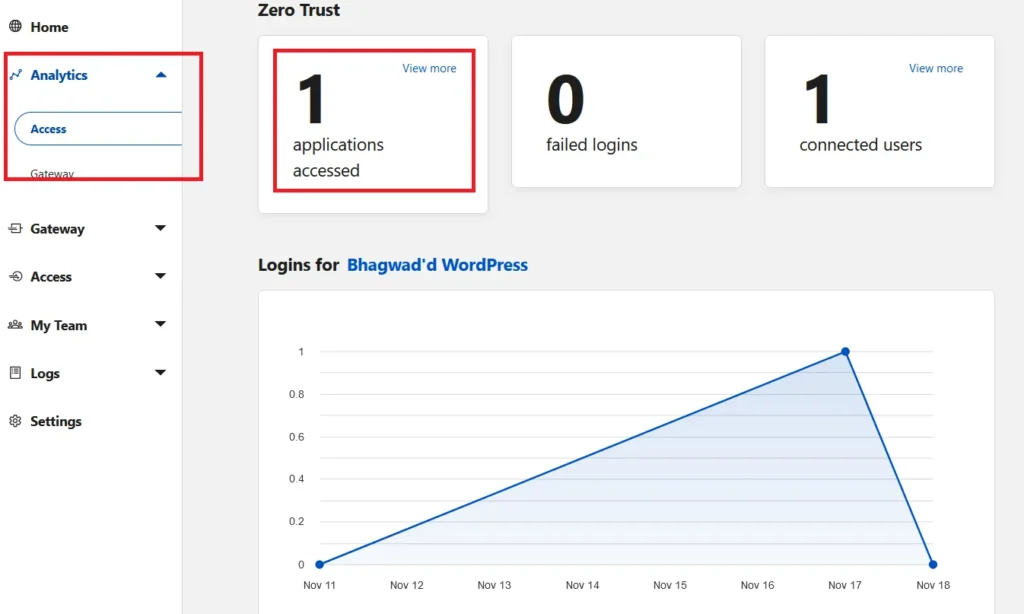
This way, you can track who’s been trying to log in.
Doesn’t Work with Cloudflare Managed Challenge Rules
I’m a big fan of using Cloudflare firewall rules for WordPress, and I strongly advocate for the “Managed Challenge” option. But I’ve found that Cloudflare Zero Trust doesn’t work well with managed challenge rules. I’ve noticed that if your browser passes the managed challenge, then Cloudflare doesn’t activate the Zero Trust interface. I don’t know if this is intentional or a bug, but it’s something to keep in mind.
Can’t Protect Multiple Paths without Wildcards
For WordPress, I’d like to protect not just wp-login.php but also /wp-admin. Unfortunately, the two URLs look nothing like each other, and Cloudflare Zero Trust only lets me have a single application path entry for protecting WordPress logins. Now you might say this isn’t a problem because /wp-admin” redirects to wp-login.php, which is protected. But I’ve found that it’s a bit janky. Sometimes Cloudflare Zero Trust will protect the WordPress login page, and sometimes it doesn’t. It might be because it already trusts me, even though I attempted to log in from a private browser.
Cloudflare Zero Trust doesn’t always handle redirects to the login page well. I suggest you try it on your own and see if it works. Let me know in the comments if you notice the same thing I do!

Hi Bhagwad,thank you for the useful tutorial. I have used the same settings in Coudlflare Access, but browser passes the managed challenge and takes me to wordpress login page. Could it be cookie issue set to private? I have a full Cloudflare dns setup with the cname records.
That worked but when using WooCommerce, and you try to logout it goes to the Cloudflare page since the wp-login handles the logout. So essentially customers cant logout.