Here’s how to create a Google Analytics 4 (GA4) events report using the report builder with custom parameters. You must create a GA4 event in Google Tag Manager with custom parameters as a prerequisite. For this tutorial, I’m using a GA4 click event with the following parameters:
- Source Page
- Clicked URL
Here’s a screenshot of the events in Google Tag Manager:
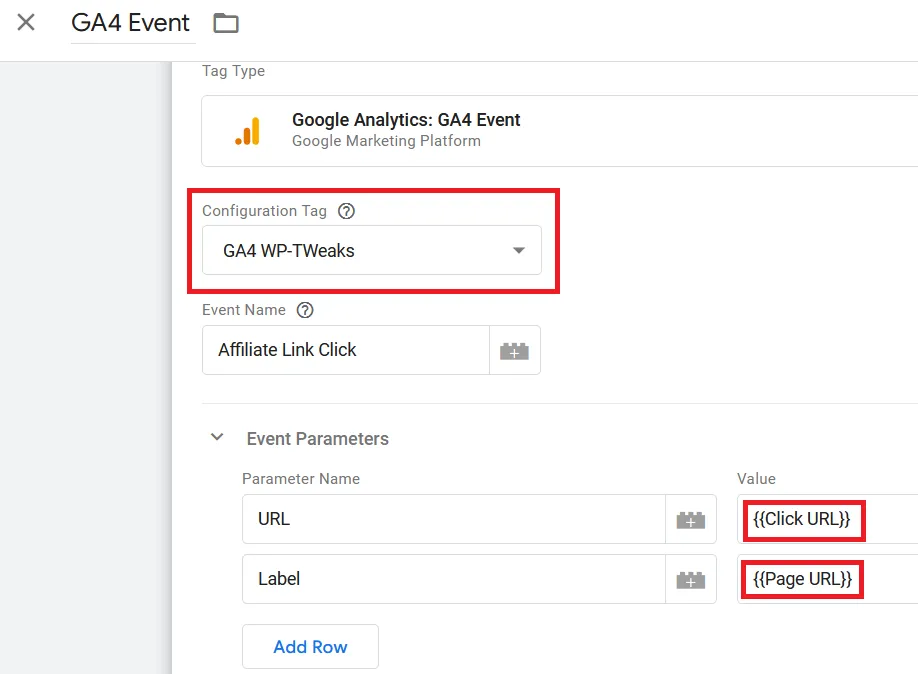
Once you’ve set up GA4 custom events in Google Tag Manager, here’s how to build an events report using the report builder.
Table of Contents
1. Create a New GA4 Events Report
Log into your Google Analytics 4 dashboard, and click “Explore” on the left-hand side as shown here:
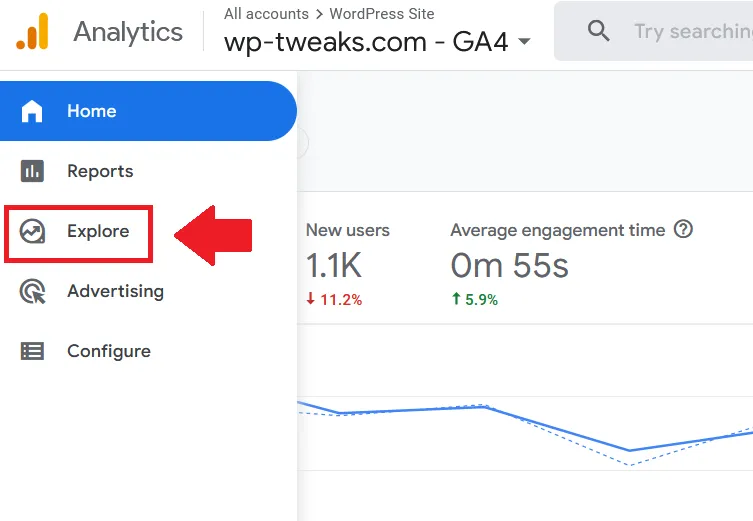
This will take you to a list of all the GA4 reports you’ve created. Start a new report by clicking the “Blank” report:
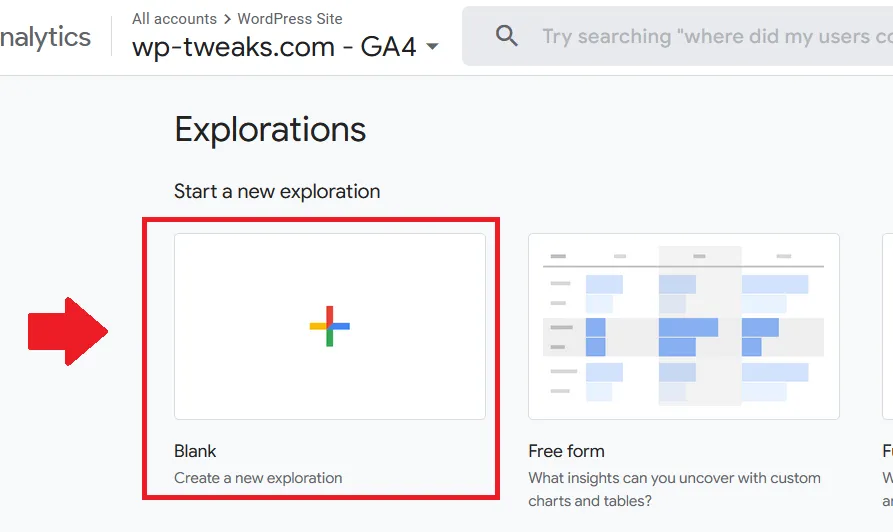
This will open the report builder.
2. Configure the GA4 Event Parameters Report
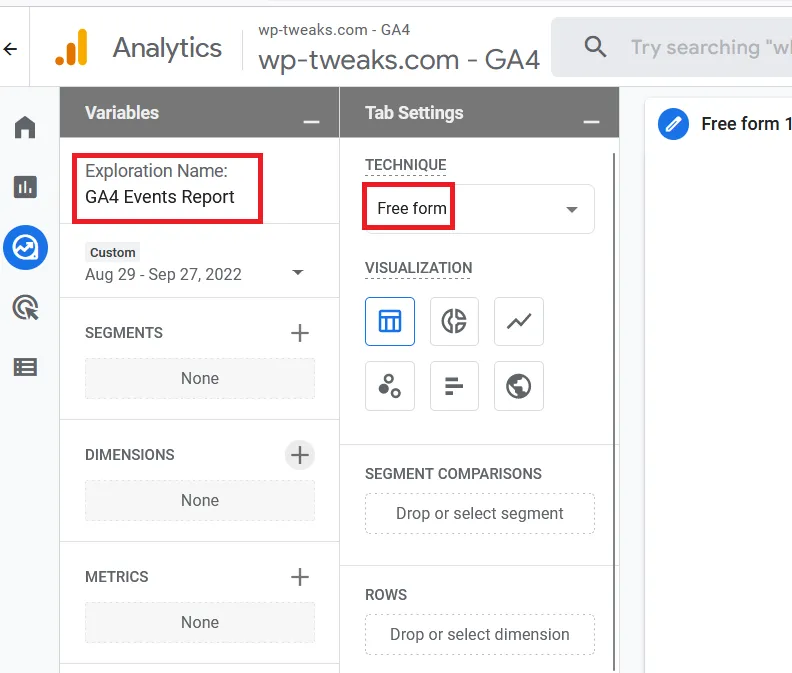
In the configuration screen, give your report a name under “Exploration Name”, and make sure that you’ve selected”Free Form” under “Technique”:
Next, bypass the “Segments” section, as we won’t be needing it.
3. Set the Google Analytics 4 Event Dimensions
Under “Dimensions”, click the plus sign to add new dimensions for the click event parameters:
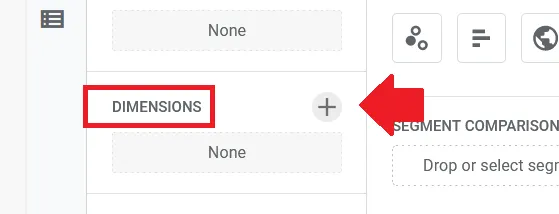
This will bring up a list of all the dimensions you want to include in your report. In our example, we choose the custom click event parameters that we created, as shown here:
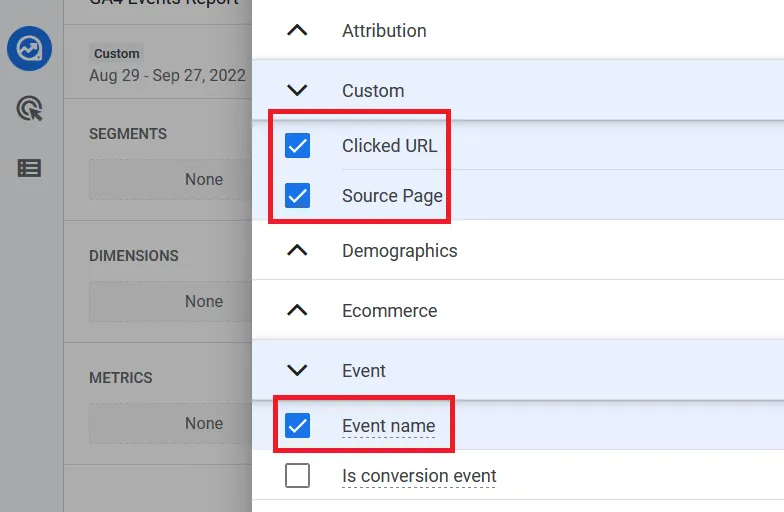
Also, include the Event name as a dimension because we’ll create a filter on the Event name to isolate the custom event parameters we need. Now click on “Import” on the top right to import the dimensions into the report:
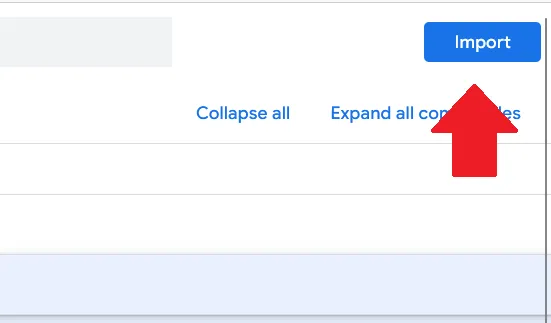
We’ll use these dimensions in the report after we set the metrics.
4. Set the GA4 Custom Event Metrics
The GA4 report builder metrics will tell us how many times each event took place. Add a new “Metric” like this:
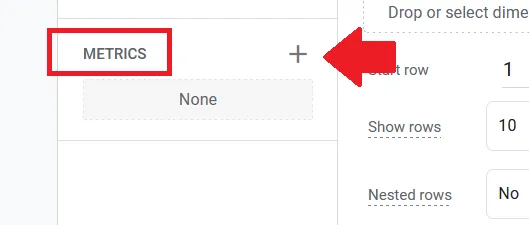
In the list of metrics, choose the values you want to track. I want to report on the total Event count and the event count per user. So select the ones you need and import them into the report:
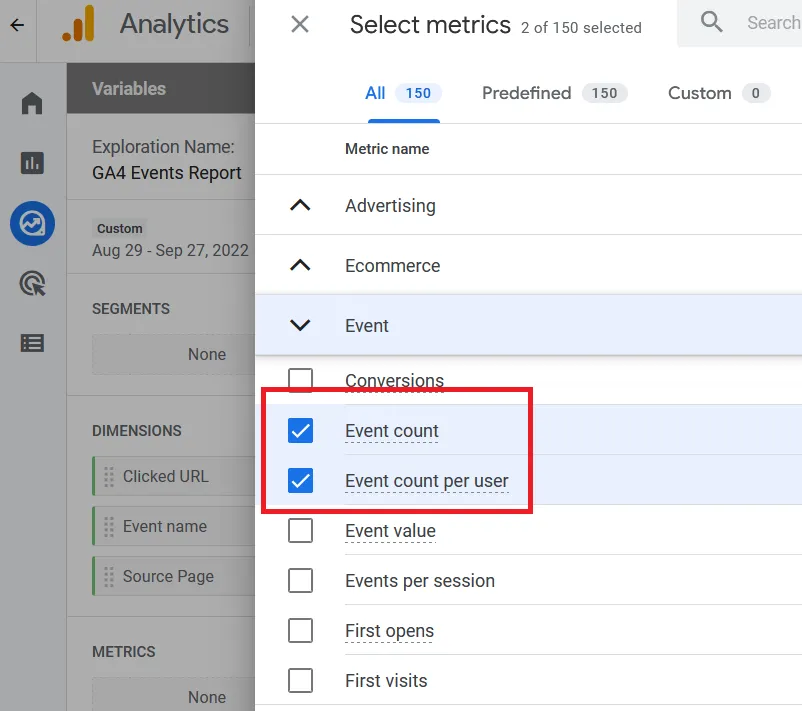
After importing the custom event parameters metrics, we define the rows and values from the dimensions and metrics we just selected.
5. Define the Rows for the GA4 Event Report
The word “Rows” is confusing. For now, select the dimensions from step 3 – namely the custom event parameters like in this screenshot:
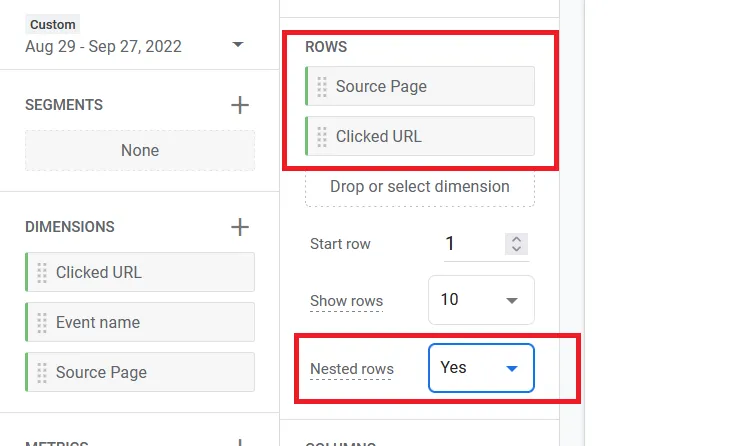
Don’t include the Event name in the rows. Select “Yes” for Nested rows.
6. Insert the Event Values
In the “Values” section, choose the metrics for the event report that you selected in step 4:
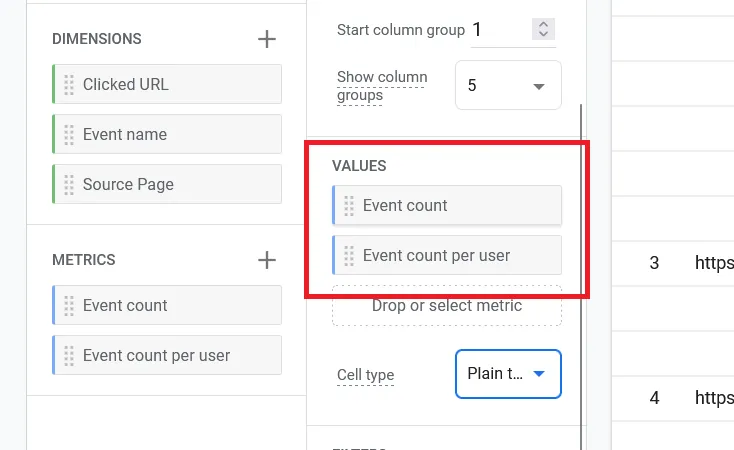
At this point, the report should have already started to fill out on the right-hand side. But it also shows a (not set) row because it’s not filtering by an event.
7. Filter the GA4 Event Report to Show Our Custom Event
At the bottom of the report, there’s a section called “Filters”. Click the box “Drop or select dimension or metric” and choose “Event name” from the list as shown here:
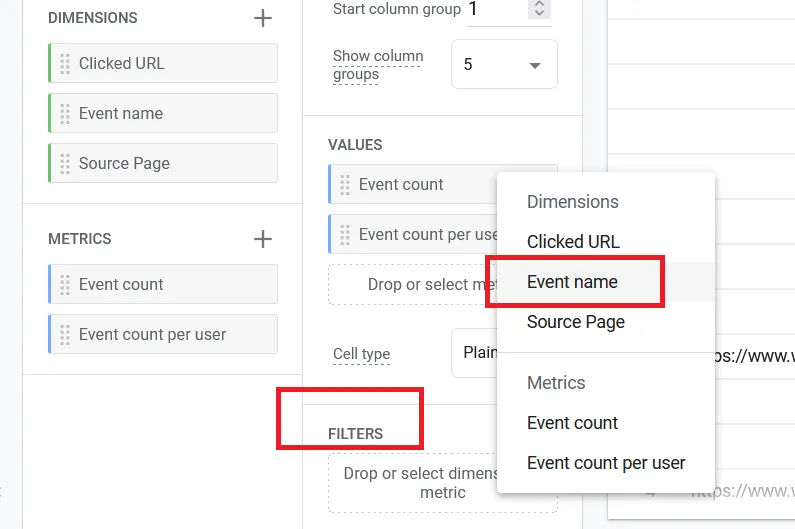
After selecting the “Event name” filter, choose “exactly matches” from the dropdown box and then type in the exact name of the custom event that you want to track:
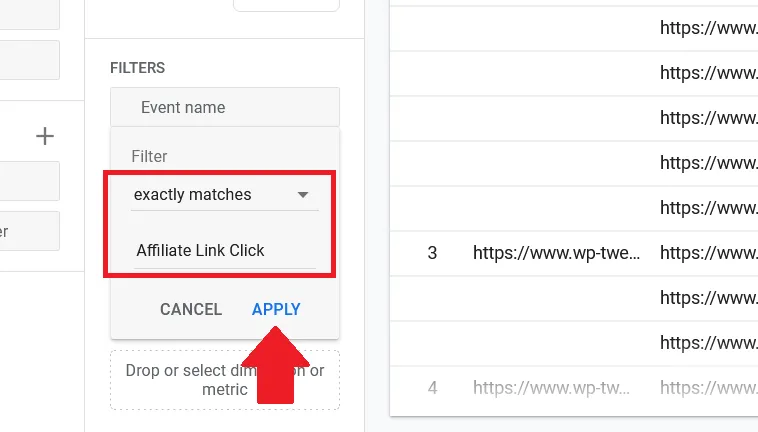
Click “Apply”, and the report on the right-hand side will update to filter the data that matches your custom event parameter. Now the GA4 click event report is complete and looks like this:
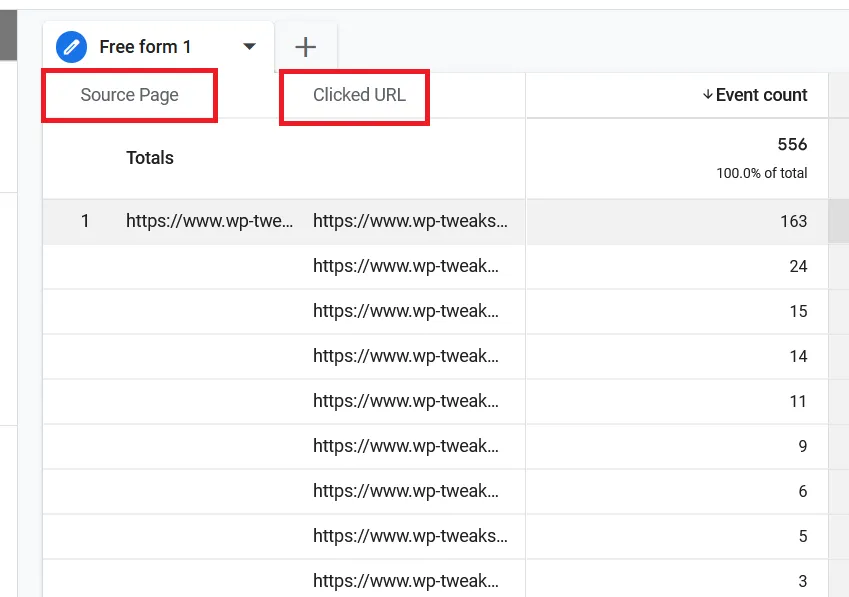
No Way to Wrap Text in the GA4 Free Form Table Report
Unfortunately, there’s no way to wrap the text in the table of the GA4 report. It’s only one of the reasons why I think the latest Google Analytics 4 is terrible. I hope they fix this soon because it’s a significant inconvenience. The only way to see everything is to export the report. I export it to a CSV file as shown here:
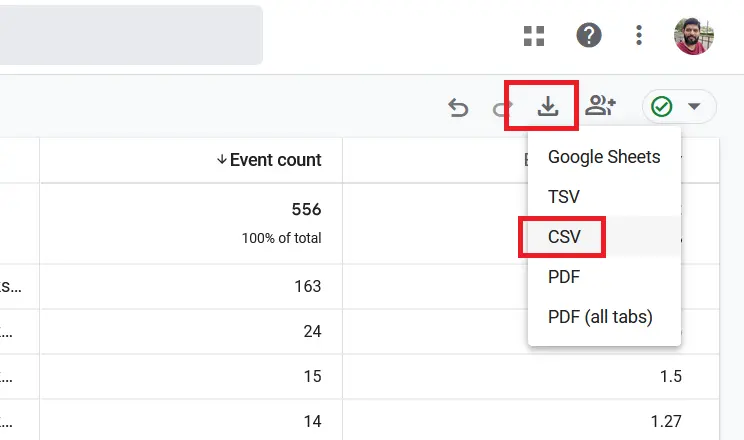
This way, you can open the report in spreadsheet software and resize the cells manually to see the data. I believe that Google will soon update the GA4 report builder to fix this glaring loophole since I don’t want to export a report each time I view it.
I’ve tried to replicate the format of the report in the older Universal Analytics tool, even though it’s missing the “Categories”, “Event Action,” and “Event Label” metrics. I hope you found this tutorial useful!

Hello,
isn’t there one step in your tutorial missing (before the whole process), where you first need to define custom dimensions based on parameters you are sending in GTM?
Regards, Alex